Preface
Goal: Updating linux in chroot environment.
Table of Content
-
Preface: Table of Content
-
1: Debian
-
2: Fedora
-
3: KaOSx
-
4: Miscellanous
Overview
One advantange of multiboot is that you can update other OS, while you are still working with current OS.
Here I use openSUSE as a primary OS, while updating other OS in chroot environment
These three OS below share very similar chroot method. There are only minor differences.
-
Debian
-
Fedora
-
KaOSx
1: Debian
Just use normal chroot method. The only issue is resolv.conf symbolic link.
chroot
Do this sequence of command, to do chroot:
% mount /media/Debian

% sudo mount --rbind  /dev /media/Debian/dev
% sudo mount --make-rslave /media/Debian/dev
% sudo mount -t proc /proc /media/Debian/proc
% sudo mount --rbind  /sys /media/Debian/sys
% sudo mount --make-rslave /media/Debian/sys
% sudo mount --rbind  /tmp /media/Debian/tmp

% sudo chroot /media/Debian
I adapt the command above from Gentoo manual.
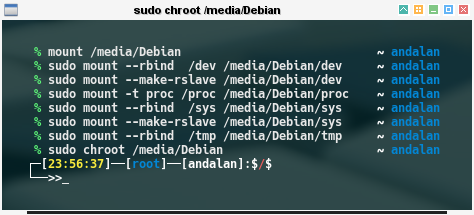
This will take you to Debian root.
Dio Putra suggestion
My friend, Dio Putra that has encrypted Debian partition, private message me, and gave me this suggestion.
-
mount -o bindinstead ofmount --rbind, This rbind make this hard to be unmounted. -
umount -Rinstead ofumount -f -
No need to bind
/tmp
Rename resolv.conf
To enable internat access, we must have /etc/resolv.conf. We need to get rid of the original symlink, and replace with a new one.
/etc/resolv.conf -> /run/NetworkManager/resolv.conf
% sudo mv /media/Debian/etc/resolv.conf /media/Debian/etc/resolv.conf.symlink
% sudo cp -L /etc/resolv.conf /media/Debian/etc/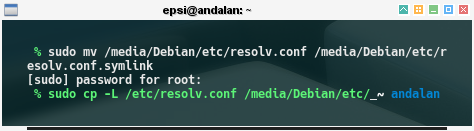
There is this other method using fstab.
/etc/resolv.conf chroot_folder/etc/resolv.conf none bind,auto 0 0Update
# mount -a
# apt update
# apt upgrade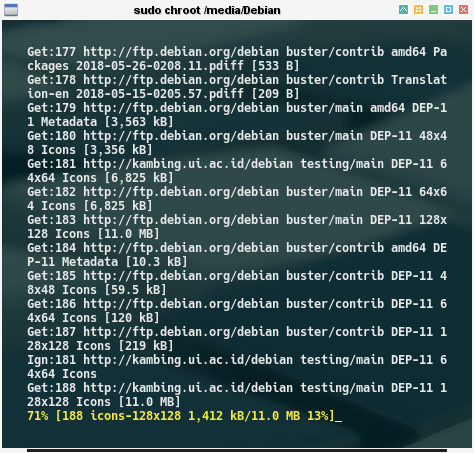
Restore resolv.conf
Do not forget to restore the original /etc/resolv.conf
% sudo rm /media/Debian/etc/resolv.conf
% sudo mv /media/Debian/etc/resolv.conf.symlink /media/Debian/etc/resolv.conf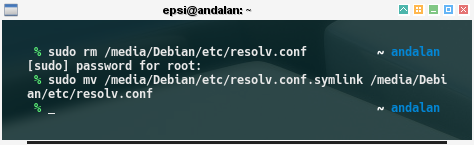
Post chroot
Just exit, you will be back to original user prompt.
# exitUnmount all
% sudo umount /media/Debian/dev
% sudo umount /media/Debian/proc
% sudo umount /media/Debian/sys
% sudo umount /media/Debian/tmp
Sometimes the volume is busy,
you need the -f argument.
umount: /media/Debian/dev: target is busy
        (In some cases useful info about processes that
         use the device is found by lsof(8) or fuser(1).)
Sometimes it can’t be unmount.
2: Fedora
Just use normal chroot method. The only issue is resolv.conf symbolic link.
chroot
Do this sequence of command, to do chroot:
% mount /media/Fedora

% sudo mount --rbind  /dev /media/Fedora/dev
% sudo mount --make-rslave /media/Fedora/dev
% sudo mount -t proc /proc /media/Fedora/proc
% sudo mount --rbind  /sys /media/Fedora/sys
% sudo mount --make-rslave /media/Fedora/sys
% sudo mount --rbind  /tmp /media/Fedora/tmp

% sudo chroot /media/Fedora
This will take you to Fedora root.
# mount -a
# dnf refresh
Rename resolv.conf
But there is an issue that we have to solve with Fedora. There is no internet access, because /etc/resolv.conf does not exist. Normally we just need to copy the file, but it cannot be copied because it is a symlink to /var/run/NetworkManager/resolv.conf that does not exit.
/etc/resolv.conf -> /var/run/NetworkManager/resolv.conf

To solve this, we just need to rename
# mv /etc/resolv.conf /etc/resolv.conf.symlinkOpen other terminal, and now you can copy.
% sudo cp -L /etc/resolv.conf /media/Fedora/etc/Update
# dnf refresh
# dnf update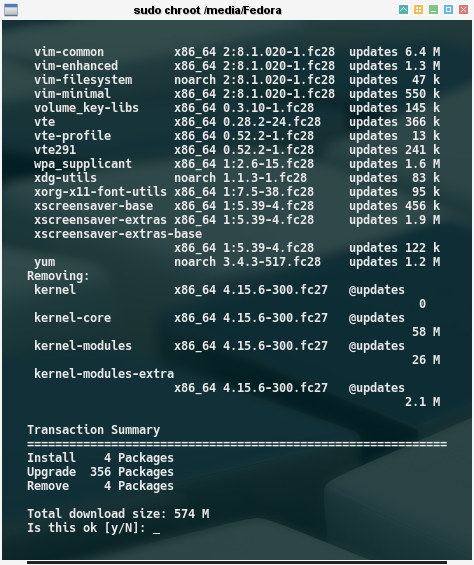
Restore resolv.conf
Do not forget to restore the original /etc/resolv.conf
# rm /etc/resolv.conf
rm: remove regular file '/etc/resolv.conf'? y

# mv /etc/resolv.conf.symlink /etc/resolv.conf
Post chroot
Just exit, you will be back to original user prompt.
# exitUnmount all
% sudo umount /media/Fedora/dev
% sudo umount /media/Fedora/proc
% sudo umount /media/Fedora/sys
% sudo umount /media/Fedora/tmp
Sometimes the volume is busy,
you need the -f argument.
3: KaOSx
Just use normal chroot method. No issue at all.
chroot
Do this sequence of command, to do chroot:
% mount /media/KaOSx

% sudo mount --rbind  /dev /media/KaOSx/dev
% sudo mount --make-rslave /media/KaOSx/dev
% sudo mount -t proc /proc /media/KaOSx/proc
% sudo mount --rbind  /sys /media/KaOSx/sys
% sudo mount --make-rslave /media/KaOSx/sys
% sudo mount --rbind  /tmp /media/KaOSx/tmp

% sudo chroot /media/KaOSx
I adapt the command above from Gentoo manual.
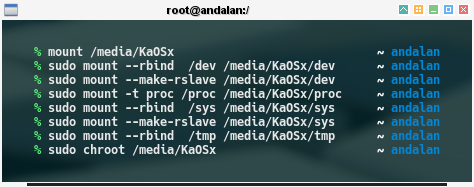
This will take you to KaOSx root.
Copy resolv.conf
To enable internat access, we must have /etc/resolv.conf.
% sudo cp -L /etc/resolv.conf /media/KaOSx/etc/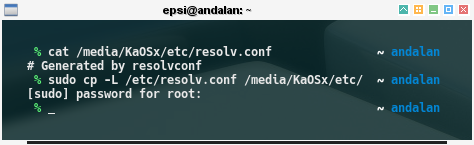
No need to restore anything later.
Update
# pacman -Syu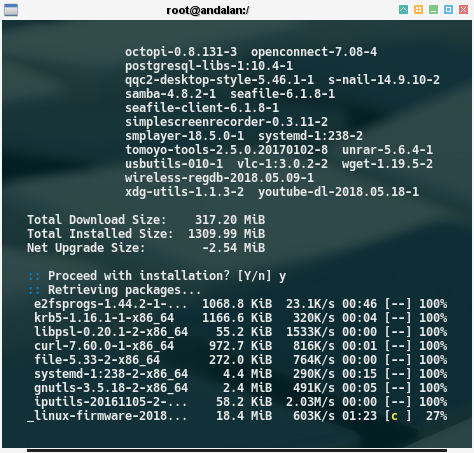
Post chroot
Just exit, you will be back to original user prompt.
# exitUnmount all
% sudo umount /media/KaOSx/dev
% sudo umount /media/KaOSx/proc
% sudo umount /media/KaOSx/sys
% sudo umount /media/KaOSx/tmp 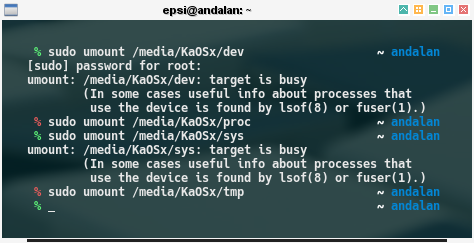
Sometimes the volume is busy,
you need the -f argument.
Sometimes it can’t be unmount.
4: Miscellanous
Reading
arch-chroot
If you are in Ubuntu, you are lucky, that Ubuntu support arch-install-scripts.
Tools
- Bhaskar Chowdhury: github.com/…/change_os_root
What’s Next?
Consider continue reading [ Network: Samba ], or consider [ GhostBSD - Multiboot ].