Dzen2 can read .xbm image format.
For your convenience, I have made some eight glyph icons.
For each has height of 24px, the same height as dzen panel example in this blog.

XBM:
Everybody has different requirement, taste and style.
Instead of giving .xbm files,
I’d better give the Source Image.
And explain the creation process.
Summary
Create Decoration to suit your own dzen2, just take a few steps. It is easier when you have Inkscape and GIMP.
Here is the Proces Flow for Each Image.
-
Inkscape: Create Vector
-
Inkscape: Export Page
-
GIMP: Indexed Mode
-
GIMP: Scale
-
GIMP: Export
-
Repeat Process: Next Image
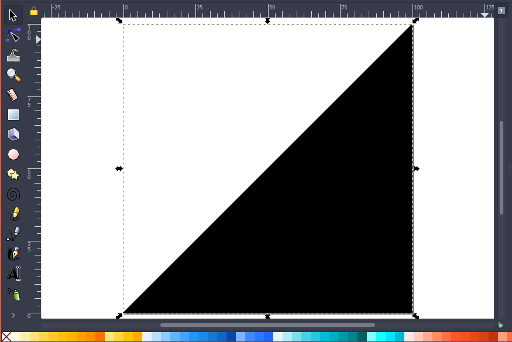
Inkscape: Create Vector
Create Inkscape .svg with size 100x100px Page size.
Create the simple shape as needed, e.g. triangle at bottom right to create a diagonal corner.
And Save this diagonal-corner.svg file.
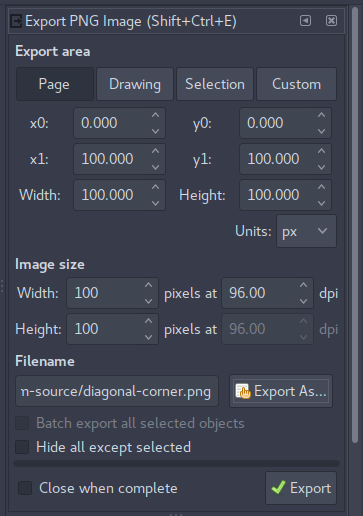
Inkscape: Export Page
Export Page to .png with 96 dpi.
e.g. diagonal-corner.png file.
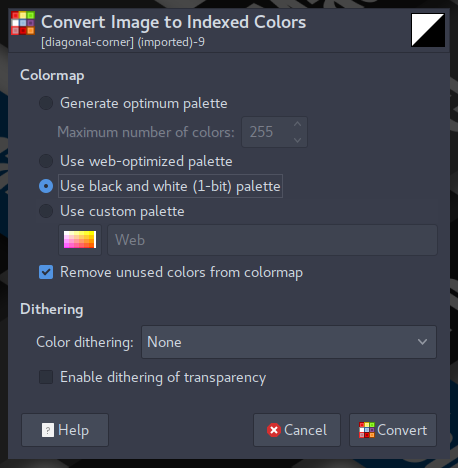
GIMP: Indexed Mode
Open .png with GIMP,
Transformed it into Black and White.
Using Image - Mode - Indexed - 1 bit Palette.
And Save this .png file.
Close The File.
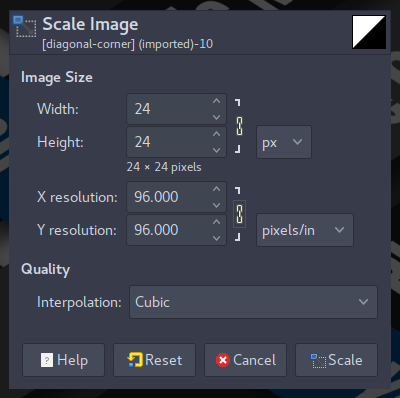
GIMP: Scale
Scale Image - Height 24. Or the same height as your panel. Do not forget to keep the ratio.
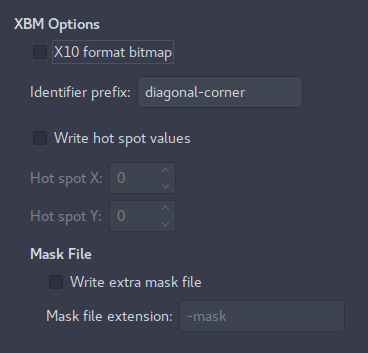
GIMP: Export
Export As - X Bitmap Image.
e.g. dc-24br-.xbm file.
Do not use X10 Format Bitmap.
Repeat Process
You may use the same process, or just use GIMP Image Transform, e.g. Image - Transform - Rotate, or Image - Transform - Flip.

Thank you for reading.