Preface
Goal: Stacked statusbar with arrow decoration using lain library.
Let me introduce you a few decoration, using Lain library. Instead using glyph, Awesome can also draw vector in its panel.
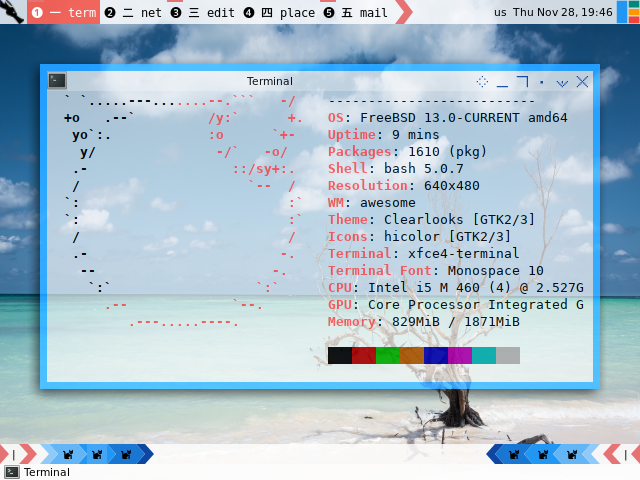
Oh yeah, Awesome also works well with GhostBSD.
Table of Content
-
Preface: Table of Content
-
1: Prerequisite
-
2: Stacked Bar
-
3: Bottom Bar: Arrow
1: Prerequisite
rc.lua
Put the statusbar code at the end of the rc.lua,
and comment other statusbar.
-- Statusbar: Wibar
--local statusbar = require("statusbar.default.statusbar")
local statusbar = require("statusbar.stacked.statusbar")
Prerequisite: The Lain Library
You need the lain library to draw arrow in panelbar,
as shape vector instead of glyph based.
If your distribution does not support lain library,
you can clone Lain in AwesomeWM configuration directory.
$ git clone https://github.com/lcpz/lainNow you can include the lain as any other library.
-- Standard awesome library
local awful     = require("awful")
local beautiful = require("beautiful")

local wibox = require("wibox")
local lain  = require("lain")

-- Custom Local Library
local gmc = require("themes.gmc")
I also use google material color (gmc.lua) to colorize the arrow.
Code Preview
For you impatient folks out there, here I represent, all modules that we are going to use.
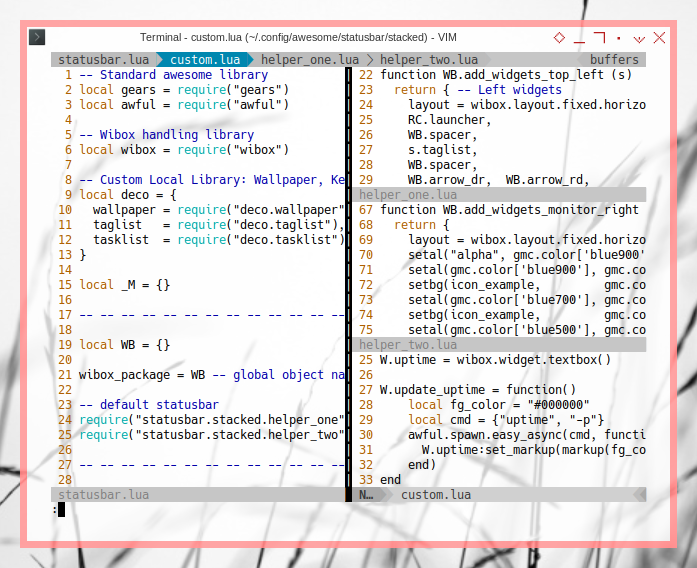
Do not get intimidated with codes above. These can be explained step by step.
2: Stacked Bar
Arranging stacked bar in AwesomeWM 4.3 is easier than in 3.5 series.
All you need to do is add another panel, such as tasklist as below:
Main Init
function _M.init()
  WB.taglist  = deco.taglist()
  WB.tasklist = deco.tasklist()

  WB.initdeco()

  awful.screen.connect_for_each_screen(function(s)
    WB.setup_common_boxes (s)

    -- Create the top wibox
    WB.generate_wibox_one(s)
    WB.generate_wibox_tasklist(s)

    -- Create the bottom wibox
    WB.generate_wibox_two(s)
  end)

end
File Naming
Since I often change my taskbar place,
I do not want use top or bottom as file helper name.
Instead I use one and two.
-- default statusbar
require("statusbar.stacked.helper_one")
require("statusbar.stacked.helper_two")
Task List Panel
You can either put the tasklist at the bottom or on top.
function WB.generate_wibox_tasklist (s)
  -- layout: tasklist

  -- Create the wibox
  s.wibox_top_bottom = awful.wibar({
    position = "bottom",
    screen = s,
    height = "16",
    widget = s.tasklist
  })
end
Remove from Default Taskbar
Do not forget to remove tasklist from the default taskbar.
function WB.generate_wibox_one (s)
  -- layout: l_left, nil, l_right

  -- Create the wibox
  s.wibox_top_top = awful.wibar({ position = "top", screen = s, height = "24" })

  -- Add widgets to the wibox
  s.wibox_top_top:setup {
    layout = wibox.layout.align.horizontal,
    WB.add_widgets_top_left (s),
    nil,
    WB.add_widgets_top_right (s),
  }
end
3: Bottom Bar: Arrow
How about drawing arrow in panelbar without glyph ? This will give us more arrow color that we can set on the fly.
Initialize Common Variable
Now we can define any variable with lain.util.separators:
local WB = wibox_package

function WB.initdeco ()
    -- Spacer
    WB.spacer = wibox.widget.textbox(" ")
    WB.spacerline = wibox.widget.textbox(" | ")

    -- Separators lain
    local separators  = lain.util.separators
    local arrow_color = gmc.color['red300']
    WB.arrow_dl = separators.arrow_left("alpha", arrow_color)
    WB.arrow_ld = separators.arrow_left(arrow_color, "alpha")
    WB.arrow_dr = separators.arrow_right("alpha", arrow_color)
    WB.arrow_rd = separators.arrow_right(arrow_color, "alpha")
end
To make our life easier, consider make a shortcut:
-- Separators lain
local separators  = lain.util.separators

-- shortcuts
local setbg = wibox.widget.background
local setar = separators.arrow_right
local setal = separators.arrow_left
Icon Example
Since this is just an example, we are going to use only one icon:
-- example
local icon_example = wibox.widget.imagebox(beautiful.widget_example)
In this case I put cat icon in the theme
theme.widget_example = icondir .. "cat.png"Now we are ready to use them in these examples: left and right.
Left Arrow Example
function WB.add_widgets_monitor_left (line, s)
  return {
    layout = wibox.layout.fixed.horizontal,
    WB.arrow_rd,
    WB.spacerline,
    WB.arrow_dr,  WB.arrow_rd,
    WB.spacer,
    setar("alpha",              gmc.color['blue200']),
    setar(gmc.color['blue200'], gmc.color['blue300']),
    setbg(icon_example,         gmc.color['blue300']),
    setar(gmc.color['blue300'], gmc.color['blue500']),
    setbg(icon_example,         gmc.color['blue500']),
    setar(gmc.color['blue500'], gmc.color['blue700']),
    setbg(icon_example,         gmc.color['blue700']),
    setar(gmc.color['blue700'], gmc.color['blue900']),
    setar(gmc.color['blue900'], "alpha"),
    WB.spacer,
  }
end
Right Arrow Example
function WB.add_widgets_monitor_right (line, s)
  return {
    layout = wibox.layout.fixed.horizontal,
    setal("alpha", gmc.color['blue900']),
    setal(gmc.color['blue900'], gmc.color['blue700']),
    setbg(icon_example,         gmc.color['blue700']),
    setal(gmc.color['blue700'], gmc.color['blue500']),
    setbg(icon_example,         gmc.color['blue500']),
    setal(gmc.color['blue500'], gmc.color['blue300']),
    setbg(icon_example,         gmc.color['blue300']),
    setal(gmc.color['blue300'], gmc.color['blue200']),
    setal(gmc.color['blue200'], "alpha"),
    WB.spacer,
    WB.arrow_dl,  WB.arrow_ld,
    WB.spacerline,
    WB.arrow_dl,
  }
end
The Panel
Now it is a good time to call both in one bottom panel.
function WB.generate_wibox_two (s)
  -- layout: l_left, nil, tasklist

  -- Create the wibox
  s.wibox_two = awful.wibar({ position = "bottom", screen = s })

  -- Add widgets to the wibox
  s.wibox_two:setup {
    layout = wibox.layout.align.horizontal,
    WB.add_widgets_monitor_left (s),
    nil,
    WB.add_widgets_monitor_right (s),
  }
end
In a more sophisticated panel, we can have more stuff between arrow as below:
![]()
4: Custom Widget
The custom example here is intended to show,
that this customization free to use any library,
other than lain or vicious.
The Custom Helper File
First thing first, we need to setup the header.
-- Standard awesome library
local awful = require("awful")
local beautiful = require("beautiful")

-- Wibox handling library
local wibox = require("wibox")
The object between Lua file:
local W = {}
clone_widget_set = W           -- object name

local I = {}
clone_icon_set = I             -- object name
The uptime widget, an icon and empty textbox.
I.uptime = wibox.widget.imagebox(beautiful.widget_fs)

W.uptime = wibox.widget.textbox()
We are not finished yet,
we need to show the uptime textbox for the first time,
W.update_uptime = function()
    local fg_color = "#000000"
    local cmd = {"uptime", "-p"}
    awful.spawn.easy_async(cmd, function(stdout, stderr, reason, exit_code)
      W.uptime:set_markup(markup(fg_color, stdout))
    end)
end

W.update_uptime()
Then regularly update the uptime textbox using timer at specified interval.
local mytimer = timer({ timeout = 30 })
mytimer:connect_signal("timeout", W.update_uptime)
mytimer:start()
Display Helper
Put these lines
-- Custom Local Library
require("statusbar.stacked.custom")
local gmc = require("themes.gmc")
And if you execute you will get the result as figure below:
function WB.add_widgets_monitor_middle (line, s)
  local cws   = clone_widget_set
  local cis   = clone_icon_set
  markup      = lain.util.markup

  return {
    layout = wibox.layout.fixed.horizontal,
    cis.uptime,          cws.uptime,
  }
end
Do not forget to add
function WB.generate_wibox_two (s)
  -- layout: l_left, nil, tasklist

  -- Create the wibox
  s.wibox_two = awful.wibar({ position = "bottom", screen = s })

  -- Add widgets to the wibox
  s.wibox_two:setup {
    layout = wibox.layout.align.horizontal,
    WB.add_widgets_monitor_left (s),
    WB.add_widgets_monitor_middle (s),
    WB.add_widgets_monitor_right (s),
  }
end
And the result is:

What is Next?
Now that we are done with stacked statusbar,
learning how to make simple custom widget,
we should be ready for a more complex statusbar,
such as using vicious library, or lain library.
![]()
Consider continue reading [ Awesome WM - Statusbar - Vicious ].