Preface
Goal: Refactoring default statusbar into different helper.
As I promised you, this is the statusbar article. It is full of Lua coding and Lua refactoring.
I also introduce the second panel, at the bottom as shown in figure below:
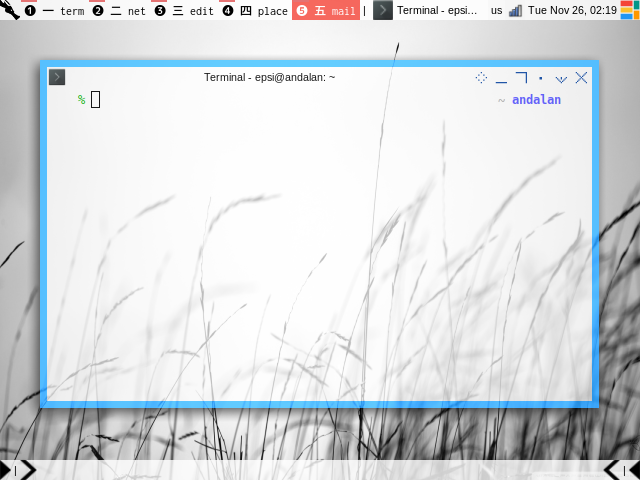
Table of Content
-
Preface: Table of Content
-
3: The Skeleton
-
5: Top Bar: Helper Default
-
6: SVG Arrows
-
7: Bottom Bar: Helper Empty
1: Statusbar Directory
I have already explain default statusbar in
Now we need to refactor further. First thing to do is move your statusbar code, to special statusbar directory, so that we can have many kind of statusbar.
statusbar.lua
Prepare the directory first.
% cd ~/.config/awesome/statusbar/defaultMove your statusbar.lua form
- ~/.config/awesome/deco/statusbar.lua
to
- ~/.config/awesome/statusbar/default/statusbar.lua
rc.lua
Put the statusbar code at the end of the rc.lua.
-- Statusbar: Wibar
local statusbar = require("statusbar.default.statusbar")
Header
The header of statusbar.lua remains the same.
-- Standard awesome library
local gears = require("gears")
local awful = require("awful")

-- Wibox handling library
local wibox = require("wibox")

-- Custom Local Library: Wallpaper, Keys and Mouse Binding
local deco = {
  wallpaper = require("deco.wallpaper"),
  taglist   = require("deco.taglist"),
  tasklist  = require("deco.tasklist")
}
We are going to use this later.
Code Preview
For you impatient folks out there, here I represent, all modules that we are going to use.

Do not get intimidated with codes above. These can be explained step by step.
2: Initialization
We are going to make a callable init, to support some variable initialization, and such functions.
local _M = {}

function _M.init()
  ...
end

return setmetatable({}, { __call = function(_, ...) return _M.init(...) end })
.
Now we can call it in rc.lua.
-- Statusbar: Wibar
local statusbar = require("statusbar.default.statusbar")

statusbar()
I hope that this is clear.
3: The Skeleton
The WB Object in One File
I would like to separate some code into different file.
Thus we need other object than _M.
Consider call it WB.
local WB = {}

function WB.generate_wibox_one (s)
  ...
end

function WB.generate_wibox_two (s)
  ...
end

function WB.setup_common_boxes (s)
  ...
end
And we can call it later:
function _M.init()
  WB.taglist  = deco.taglist()
  WB.tasklist = deco.tasklist()

  WB.initdeco()

  awful.screen.connect_for_each_screen(function(s)
    WB.setup_common_boxes (s)

    -- Create the top wibox
    WB.generate_wibox_one(s)

    -- Create the bottom wibox
    WB.generate_wibox_two(s)
  end)

end
The taglist and tasklist is defined on the header above.
The WB Object in Separate File
Unfortunately there is a tendecy that the code, become longer as complexity added, so we need to refactor more into different file.
We need two more helper, and each helper use the same WB Object.
For this to be happened,
we need to create global object called wibox_package.
local WB = {}

wibox_package = WB -- global object name

-- default statusbar
require("statusbar.default.helper_default")
require("statusbar.default.helper_empty")

function WB.setup_common_boxes (s)
  ...
end
The statusbar still have the same structure,
but we will move generate_wibox_one and generate_wibox_two,
into each respective helper.
local WB = wibox_package

function WB.generate_wibox_one (s)
  ...
end
And respectively
local WB = wibox_package

function WB.generate_wibox_two (s)
  ...
end
Now we know how it works. Consider go further into the details.
4: Main Statusbar
Remember this loop in init?
function _M.init()
  awful.screen.connect_for_each_screen(function(s)
    WB.setup_common_boxes (s)
    ...
  end)
end
We move each common step in loop in this function below:
function WB.setup_common_boxes (s)
  -- Wallpaper
  set_wallpaper(s)

  -- Create a promptbox for each screen
  s.promptbox = awful.widget.prompt()

  -- Create an imagebox widget which will contain an icon indicating which layout we're using.
  -- We need one layoutbox per screen.
  s.layoutbox = awful.widget.layoutbox(s)
  s.layoutbox:buttons(gears.table.join(
    awful.button({ }, 1, function () awful.layout.inc( 1) end),
    awful.button({ }, 3, function () awful.layout.inc(-1) end),
    awful.button({ }, 4, function () awful.layout.inc( 1) end),
    awful.button({ }, 5, function () awful.layout.inc(-1) end)
  ))

  -- Create a taglist widget
  s.taglist = awful.widget.taglist {
    screen  = s,
    filter  = awful.widget.taglist.filter.all,
    buttons = WB.taglist
  }

  -- Create a tasklist widget
  s.tasklist = awful.widget.tasklist {
    screen  = s,
    filter  = awful.widget.tasklist.filter.currenttags,
    buttons = WB.tasklist
  }
end
5: Top Bar: Helper Default
Consider dive into detail
Main Wibox
Not exactly the same as the default statusbar. In fact, I refactor into three layouts: [left, tasklist, right].
function WB.generate_wibox_one (s)
  -- layout: l_left, tasklist, l_right

  -- Create the wibox
  s.wibox_top = awful.wibar({ position = "top", screen = s })

  -- Add widgets to the wibox
  s.wibox_top:setup {
    layout = wibox.layout.align.horizontal,
    WB.add_widgets_left (s),
    WB.add_widgets_middle (s),
    WB.add_widgets_right (s),
  }
end
Each Widget
And each widget has each own function:
function WB.add_widgets_left (s)
  return { -- Left widgets
    layout = wibox.layout.fixed.horizontal,
    RC.launcher,
    s.taglist,
    wibox.widget.textbox(" | "),
    s.promptbox,
  }
end

function WB.add_widgets_middle (s)
  return s.tasklist -- Middle widget
end

function WB.add_widgets_right (s)
  return { -- Right widgets
    layout = wibox.layout.fixed.horizontal,
    mykeyboardlayout,
    wibox.widget.systray(),
    mytextclock,
    s.layoutbox,
  }
end
I also rename promptbox from mypromptbox,
so you shold also change it in keybinding.
The Header
Do not forget the header, as usual:
-- Standard awesome library
local awful     = require("awful")
local beautiful = require("beautiful")

-- Wibox handling library
local wibox = require("wibox")

-- global object
local WB = wibox_package

-- Create a textclock widget
mytextclock = wibox.widget.textclock()

-- Keyboard map indicator and switcher
mykeyboardlayout = awful.widget.keyboardlayout()
6: SVG Arrows
The reason I put the second panel is that, I want to introduce some decoration. The next statusbar might use this decoration, and I do not want to burden the next turorial with decoration explanation. I should settle this here, in the first place.
The Decoration
Consider have a look at the bottom panel code:
function WB.initdeco ()
    -- Spacer
    WB.spacer = wibox.widget.textbox(" ")
    WB.spacerline = wibox.widget.textbox(" | ")

    -- Separators png
    WB.ar_lr_pre   = wibox.widget.imagebox()
    WB.ar_lr_pre:set_image(beautiful.arrow_lr_pre)
    WB.ar_lr_post  = wibox.widget.imagebox()
    WB.ar_lr_post:set_image(beautiful.arrow_lr_post)
    WB.ar_lr_thick = wibox.widget.imagebox()
    WB.ar_lr_thick:set_image(beautiful.arrow_lr_thick)
    WB.ar_lr_thin  = wibox.widget.imagebox()
    WB.ar_lr_thin:set_image(beautiful.arrow_lr_thin)

    WB.ar_rl_pre   = wibox.widget.imagebox()
    WB.ar_rl_pre:set_image(beautiful.arrow_rl_pre)
    WB.ar_rl_post  = wibox.widget.imagebox()
    WB.ar_rl_post:set_image(beautiful.arrow_rl_post)
    WB.ar_rl_thick = wibox.widget.imagebox()
    WB.ar_rl_thick:set_image(beautiful.arrow_rl_thick)
    WB.ar_rl_thin  = wibox.widget.imagebox()
    WB.ar_rl_thin:set_image(beautiful.arrow_rl_thin)
end
And we call it in statusbar.lua:
function _M.init()
  WB.taglist  = deco.taglist()
  WB.tasklist = deco.tasklist()

  WB.initdeco()

  awful.screen.connect_for_each_screen(function(s)
    ...
  end)
end
Where are this arrow variable comming from? Of course from theme.
theme.arrow_lr_thick     = theme_path .. "misc/clone/arrow_lr_thick.png"
theme.arrow_lr_thin      = theme_path .. "misc/clone/arrow_lr_thin.png"
theme.arrow_lr_pre       = theme_path .. "misc/clone/arrow_lr_pre.png"
theme.arrow_lr_post      = theme_path .. "misc/clone/arrow_lr_post.png"
theme.arrow_rl_thick     = theme_path .. "misc/clone/arrow_rl_thick.png"
theme.arrow_rl_thin      = theme_path .. "misc/clone/arrow_rl_thin.png"
theme.arrow_rl_pre       = theme_path .. "misc/clone/arrow_rl_pre.png"
theme.arrow_rl_post      = theme_path .. "misc/clone/arrow_rl_post.png"
Custom Arrow
I have made my own custom SVG source, inspired by multicolor theme icons.
![]()
You might want to alter the image yourself to suit your needs, e.g. blue or pink, or minimalist shape something.
SVG Source
SVG source available at:
7: Bottom Bar: Helper Empty
Again, consider dive into detail
Main Wibox
This time, we do not need middle layout.
function WB.generate_wibox_two (s)
  -- layout: l_left, l_mid, tasklist

  -- Create the wibox
  s.wibox_two = awful.wibar({ position = "bottom", screen = s })

  -- Add widgets to the wibox
  s.wibox_two:setup {
    layout = wibox.layout.align.horizontal,
    WB.add_widgets_monitor_left (s),
    WB.spacer,
    WB.add_widgets_monitor_right (s),
  }
end
Each Widget
So we only need two function: left and right.
function WB.add_widgets_monitor_left (line, s)
  return {
    layout = wibox.layout.fixed.horizontal,
    WB.ar_lr_post,
    WB.spacerline,
    WB.ar_lr_thin
  }
end
function WB.add_widgets_monitor_right (line, s)
  return {
    layout = wibox.layout.fixed.horizontal,
    WB.ar_rl_thin,
    WB.spacerline,
    WB.ar_rl_pre
  }
end
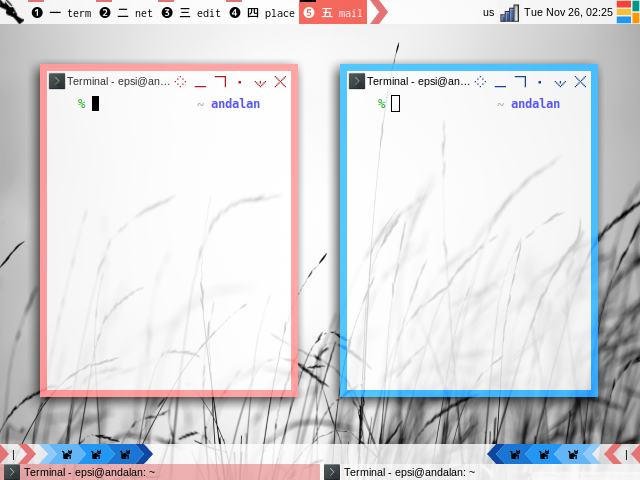
This basically, just showing those tiny arrows.
The Header
Just in case you forget:
-- Standard awesome library
local awful     = require("awful")
local beautiful = require("beautiful")

-- Wibox handling library
local wibox = require("wibox")

-- global object
local WB = wibox_package
What is Next?
Now that we are done with refactoring the default statusbar, we should be ready for a more complex statusbar, such as using Vicious library, or Lain library.
Consider continue reading [ Awesome WM - Statusbar - Stacked ].