Preface
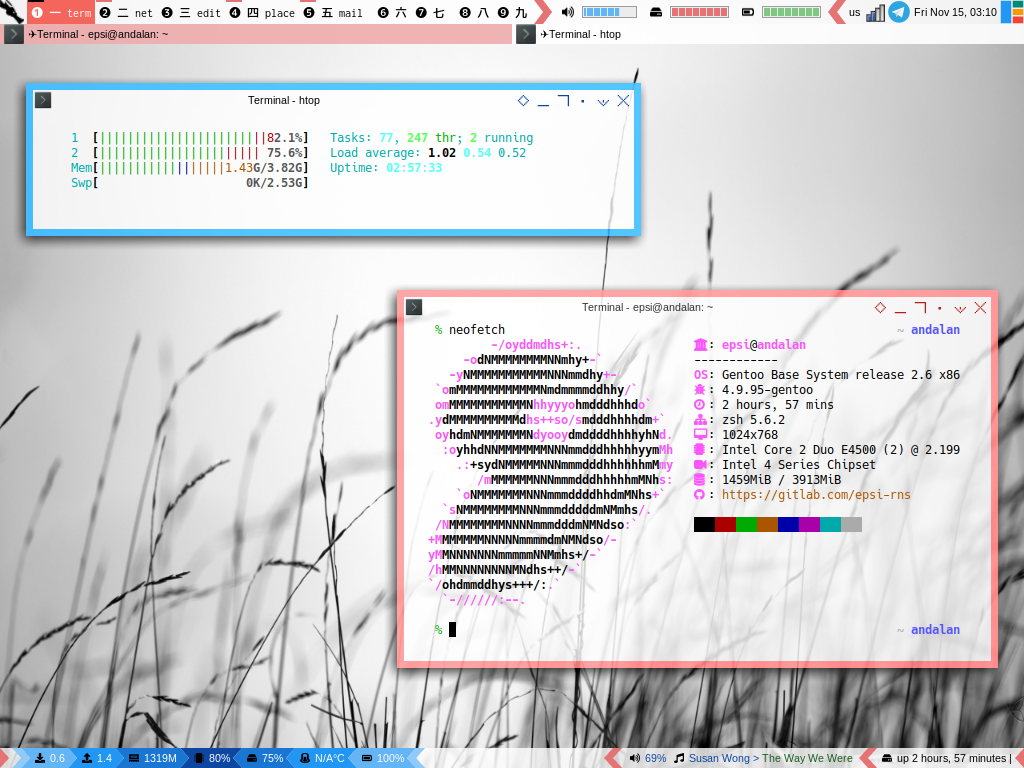
Goal: Statusbar customization, with powerline style using Lain.
This is not another library, such as Vicious and Lain, but just Arrow decoration using Lain, mixed with Lain widgets.

If the previous article talk about how to use Lain, this article explain how to decorate it.
Table of Content
I know this section is short
-
Preface: Table of Content
-
1: Prerequisite
1: Prerequisite
rc.lua
Put the statusbar code at the end of the rc.lua,
and comment other statusbar.
-- Statusbar: Wibar
--local statusbar = require("statusbar.lain.statusbar")
local statusbar = require("statusbar.arrow.statusbar")
Prerequisite: The Lain Library
Since we use lain, the configuration is the same with previous article.
Artefacts
This is basically just using Lain library.
We need additional custom.lua for non lain widget.
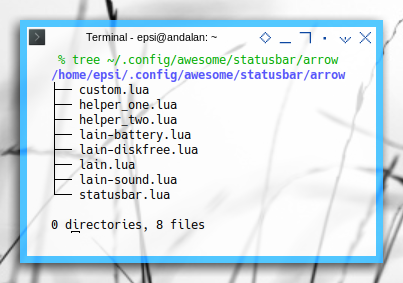
tree ~/.config/awesome/statusbar/arrow
/home/epsi/.config/awesome/statusbar/arrow
├── custom.lua
├── helper_one.lua
├── helper_two.lua
├── lain-battery.lua
├── lain-diskfree.lua
├── lain.lua
├── lain-sound.lua
└── statusbar.lua

0 directories, 8 files
I use one and two for helper name.
Arrow Decoration
The same as previous article.
Code Preview
Very similar with previous article.
2: Arrow Example
It is a good time to put these bunch of technique together.
Left Wibox
function WB.add_widgets_monitor_left (line, s)
  return {
    layout = wibox.layout.fixed.horizontal,
    WB.arrow_rd,
    WB.spacer,
    setar("alpha",              gmc.color['blue200']),
    setar(gmc.color['blue200'], gmc.color['blue300']),
    setbg(cis.netdown,          gmc.color['blue300']),
    setbg(cws.netdowninfo,      gmc.color['blue300']),
    setar(gmc.color['blue300'], gmc.color['blue500']),
    setbg(cis.netup,            gmc.color['blue500']),
    setbg(cws.netupinfo,        gmc.color['blue500']),
    setar(gmc.color['blue500'], gmc.color['blue700']),
    setbg(cis.mem,              gmc.color['blue700']),
    setbg(cws.mem,              gmc.color['blue700']),
    setar(gmc.color['blue700'], gmc.color['blue900']),
    setbg(cis.cpu,              gmc.color['blue900']),
    setbg(cws.cpu,              gmc.color['blue900']),
    setal(gmc.color['blue900'], gmc.color['blue700']),
    setbg(cis.fs,               gmc.color['blue700']),
    setbg(cws.fs,               gmc.color['blue700']),
    setal(gmc.color['blue700'], gmc.color['blue500']),
    setbg(cis.temp,             gmc.color['blue500']),
    setbg(cws.temp,             gmc.color['blue500']),
    setal(gmc.color['blue500'], gmc.color['blue300']),
    setbg(cis.bat,              gmc.color['blue300']),
    setbg(cws.bat,              gmc.color['blue300']),
    setal(gmc.color['blue300'], gmc.color['blue200']),
    setal(gmc.color['blue200'], "alpha"),
    WB.spacer,
  }
end
Playing with color would makes the status bar pretty right!
Right Wibox
And if you want more simple color.
function WB.add_widgets_monitor_right (line, s)
  return {
    layout = wibox.layout.fixed.horizontal,
    WB.arrow_dl,         WB.arrow_ld,
    WB.spacer,
    cis.volume,  cws.volume,
    cis.mpd,     cws.mpd,
    WB.spacer,
    WB.arrow_dl,         WB.arrow_ld,
    cis.uptime,          cws.uptime,
    WB.spacerline,
    WB.arrow_dl,
  }
end
Top Right Wibox
I also move the progressbar to the top.
function WB.add_widgets_top_right (s)
  local cws = clone_widget_set
  local cis = clone_icon_set

  return { -- Right widgets
    layout = wibox.layout.fixed.horizontal,

    --  progressbar
    cis.volume_dynamic,  cws.volumewidget,
    cis.disk,            cws.disk_bar_widget,
    cis.battery,         cws.battery_bar_widget,

    -- default
    WB.arrow_dl,         WB.arrow_ld,
    mykeyboardlayout,
    wibox.widget.systray(),
    mytextclock,
    s.layoutbox,
  }
end
Conclusion
I think that is all. After this article, we are done.
Better Example
I do not claim myself to be mastered of AwesomeWM of something, these articles I have wrote is intended to be guidance for beginner.
If you need sophisticated statusbar widgets programming with Lua, you can go right away to Pavel Makhov site:
These will be a very interesting discussion, but unfortunately, this is beyond of my blog scope.
Farewell
I’ll be back!
What do you think ?