i3 is also an easy WM for beginner. It doesn’t have need complex configuration. You can just install it, and use it, the tiling rule is simple. Except that it start with intimidating black screen, so you have to read the manual to learn the keystrokes. But once you get along with i3, i3 is actually a very comfortable Tiling Window Manager.
Reading:
Guidance in The Fine Manual is enough.
- User Guide: https://i3wm.org/docs/userguide.html

Install i3 WM
Installing i3 will also install three packages,
it is i3-wm, i3lock and i3status.
You can issue either one of this.
$ sudo pacman -S i3
$ sudo pacman -S i3-wm i3lock i3status 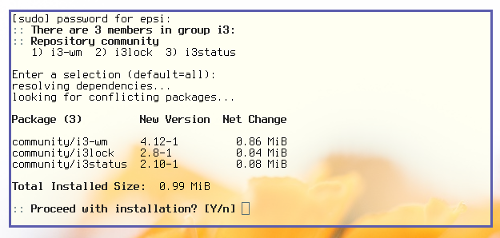
i3status use confuse library.
It will be installed automatically.
Running i3 WM
To switch to i3 WM after installation completed, you can logout your current DE/WM (Desktop Environment or Window Manager). In your DM (Display Manager), login with i3 WM Session.
If you need to make sure, that i3 is in you DM list. You can check xsession directory.
$ ls /usr/share/xsessions/
awesome.desktop        gnome.desktop  plasma.desktop
enlightenment.desktop  hidden         xfce.desktop
gnome-classic.desktop  i3.desktop     xmonad.desktop
On first run, i3-config-wizard will
create ~/.config/i3/config.
Install i3 Blocks
There is an i3blocks tool to help you getting pretty i3statusbar. It is a useful additional package.
i3blocks is available in AUR (Arch User Repository).
In order to install i3, you must use AUR Helper,
e.g. yaourt, aura, packer, pacaur, or else.
$ pacaur -y i3blocksor
$ yaourt -S i3blocks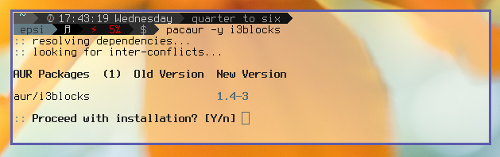
Install i3 Gaps
There is an Unofficial Fork of i3 from AirBlader. The most interesting feature is Gaps between window.
i3-gaps is available in AUR (Arch User Repository).
In order to install i3, you must use AUR Helper,
e.g. yaourt, aura, packer, pacaur, or else.
Since it is an i3 fork, you can’t have both installed.
This command will install i3-gaps,
and also uninstall i3-wm.
$ pacaur -y i3-gapsor
$ yaourt -S i3-gaps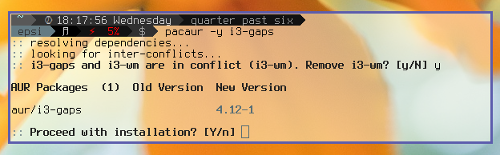
To go back from i3-gaps,
install i3-wm.
$ sudo pacman -S i3-wm Sample Configuration
If the default config is not suitable enough, you can customize the config for your needs. I prefer to put my i3status and i3blocks inside my i3 config directory, and create my custom config later from copy of the default one.
$ cat ~/.config/i3/config

$ mkdir ~/.config/i3/i3status
$ cp /etc/i3status.conf ~/.config/i3/i3status/default.conf

$ mkdir ~/.config/i3/i3blocks
$ cp /etc/i3blocks.conf ~/.config/i3/i3blocks/default.conf
i3status with Conky
To enable, of course you have to install conky.
The lua package is needed as a mandatory dependency for conky since v1.10.
Since Conky is optional. It is beyond this scope
to explain conky installation in detail.
$ sudo pacman -S lua conkyModularized i3status Configuration
Although i3 config is very simple, however i3status using conky-lua-json is complex.
My configuration dotfiles is here. You can copy for your own needs.
Since this configuration is already modularized, it is easier to learn part by part.
Additional Package
For your convenience,
you can choose to install either dmenu or rofi.
Both provide the same purpose to run command,
except rofi has more feature.
$ sudo pacman -S dmenu
$ sudo pacman -S rofi
Source Code
Window Manager
Statusbar
Jekyll Site Source.
Thank you for reading and visiting.