This is a remake of my facebook note with a similar title.
Even if you have installed your linux successfully you still need to know your own hardware. This article also useful to debug networking issue, especially for first time linux install.

Table of Content
1: Device
First thing to do is knowing where your device plugged in, pci or usb.
It can be done with this simple command
># lspci 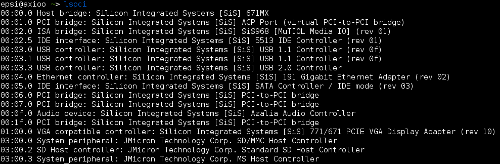
This command requires some privileges, so it might be different in other distro.
For Ubuntu, add the word sudo.
$ sudo lspci 
If you have no luck with this command, maybe it is plugged-in by usb connexion.
Image below shows a Realtek 8187 in
># lsusb 
Le’ts see what related device with 802.11 standard
># lsmod | grep 802 
Well… it is also nice to know this command. It shows what happened to my realtek 8187 device in boot time.
># dmesg | grep 8187 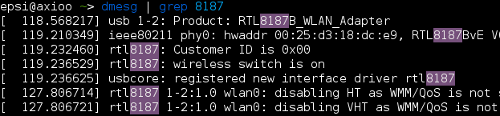
Some wireless card need to be turned on manually.
So let’s check it out with rfkill command
># rfkill list 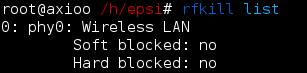
2: Network
Now we need to list our device. Physical name could be different.
Since iwconfig has been deprecated, we are using iw.
># iw dev 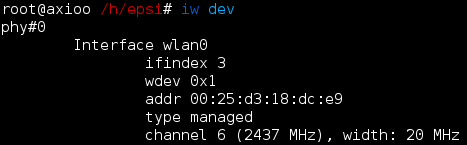
And scan our available essid for our wireless
># iw dev wlan0 scan | grep -i ssid 
From this step, we may choose method to connect to your wireless.
There are many methods, but you can only chooses one method at a time.
This will show you NetworkManager using nmcli command,
and other method using iw command.
3: Using ‘nmcli’
NetworkManager is installed automatically because it is a dependency for gnome-shell, and maybe also cinnamon and unity. So it is the common preference method unless you are not using those desktop environment. Some linux prefer other method, e.g Arch let the user choose any method, and Mageia using an applet to manage network. Again, let’s do it with command line.
># nmcli dev wifi connect mataharani You can use iw to check if it is works.
># iw dev wlan0 link And ping google to make sure.
># ping google.com -c 2 Finally, you may disconnect,
># nmcli dev disconnect iface wlan0 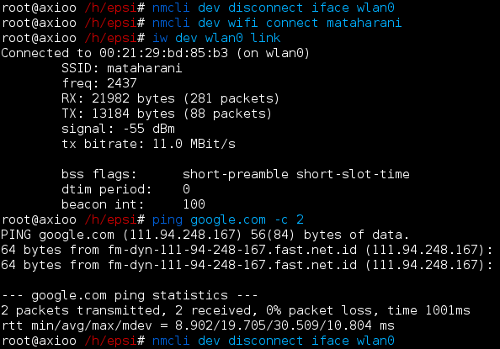
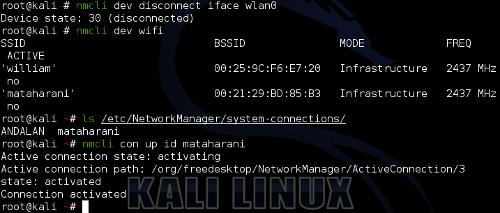
The wifi connect command
only supported after Netwok Manager 0.96.
Kali Linux 1.x series is still using 0.9.4 series of Netwok Manager.
It does not support connect command.
So it is a little bit different.
4: Stop using Network Manager
I like the way Arch Linux giving me option what kind of method that I can use to connect my wireless with. it require more steps, and it needs ‘dhcpcd’. To experiment this with my current notebook, I also need to shutdown my NetworkManager service form systemd. Luckily we can apply the same method to other distro.
Let’s see how we do it with SysV, systemd and upstart. There are other interesting init. e.g. OpenRC, but it is beyond this scope. Still, you can see example of OpenRC in lamp setup here.
Before you begin, please stop your currently running NetworManager service
Using SysV
># service network-manager stop Using systemd
># systemctl disable NetworkManager.service ># systemctl stop NetworkManager.service Using upstart
># sudo service network-manager stop Don’t forget to enable later, after you finished with your experiment.
5: Using ‘iw dev’
Now we can start some experiment with other method.
Note: Tested with Debian Jessie, Arch, Mageia 3 and Kali 1.06.
But I still got no luck with Ubuntu Trusty beta in my notebook.
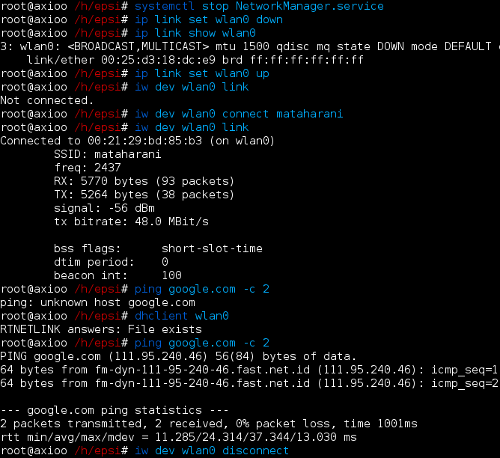
Sometimes you also need to use
ip link command to activate your device.
The ifconfig command has been deprecated and replaced by ip command.
># ip link show wlan0 ># ip link set wlan0 up Then you can use ‘iw dev’
># iw dev wlan0 connect mataharani Again.. check your connexion.
># iw dev wlan0 link And reserved your IP with dhcpcd
># dhclient wlan0 Now you can ping
># ping google.com -c 2